Free tools for distance learning
This page shows various ways you can use Problem-Attic for distance learning. Everything described here is in the free part of the website; no subscription is needed.
Please note: there are 320,000 questions in Problem-Attic which are available to anyone who signs up. To keep the focus on delivering questions to students (and sharing documents with other teachers), we won’t talk about the database here, or the methods for selecting questions. For hints and shortcuts, see this page.
PDF documents, sharing through Google
The typical classroom use of Problem-Attic is to make a PDF document, download and print it, and give copies to students. For remote learning, of course, that’s not possible. An alternative is to provide a PDF to students in electronic form. If you like, you can create it in Problem-Attic, download it, and attach it to an email, or upload it to another program like Google Drive or Dropbox. But there’s an even better way...
In Problem-Attic, the fastest and easiest way to send out a PDF document is to use the “Share with students” button. It’s on the Make PDF tab, as shown here:
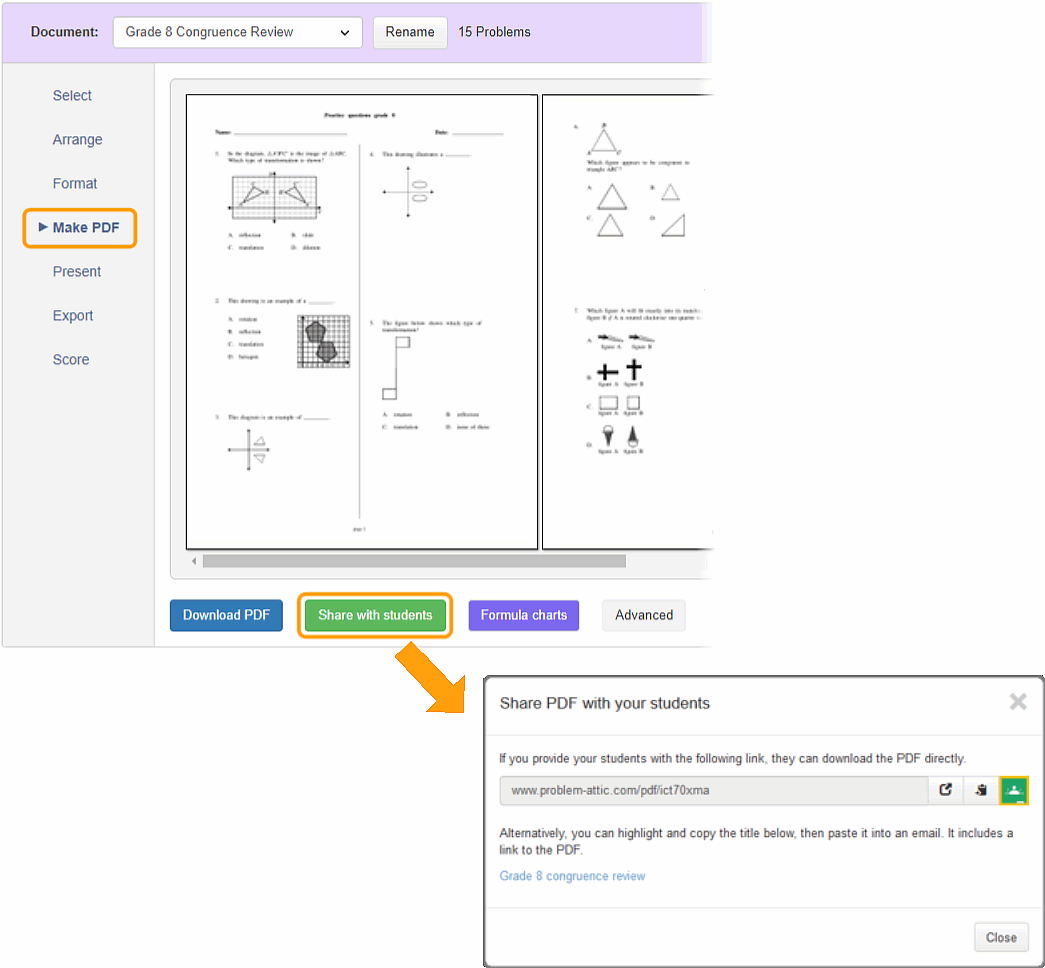
If you click the button, Problem-Attic will host the PDF and you only have to provide a link (URL). There are many different ways of getting the link to students: in an email, by posting it in an LMS or on a teacher website, or by sending it to Google Classroom.
When a student clicks the link, the PDF will open on the student’s device (computer, tablet, etc.), usually in a browser window. There it can be viewed onscreen, saved, or printed.
Important: students will see whatever is in the preview window when you click the sharing button. If you don’t want them to see the answer key, turn it off on the Format tab before you click Make PDF. Afterward, you can safely turn on the answer key, because the link you gave students is not “live”. They won’t see any changes you make unless you click the sharing button again. (The link will remain the same, but the PDF document will get updated.)
Formatting options: calendars, flashcards and overheads
Many people use Problem-Attic without discovering its formatting options. The options are important, because they help you use the program for more than just tests and worksheets.
If you click the Format tab, you will see an option for changing the page layout. It’s called “template”. By clicking the left or right triangle buttons, you can change the template, as shown here:

As you’ll see, there are various ways to format questions, such as flash cards or game cards and problem-of-the-day calendars (weekly or monthly). A template which is particularly useful—and versatile—is called “overheads”. Don’t take the name too literally. The template gives you one problem per page, which can serve a variety of purposes, including a slideshow or online lesson.
One advantage of the overhead template is that questions are reduced in size to fit. If you need to copy the questions and use them in another program (say, a Google Quiz), you can do a screen capture or convert the PDF into separate single-page images.
Note: Problem-Attic’s Terms of Service allow you to cut and paste questions into other programs as long as you are delivering them to your students and you aren’t trying to build a separate database. To share with other teachers, see the method below.
Online instruction: drawing on a virtual whiteboard
The PDFs that you create in Problem-Attic work very well for instruction (not just assessment). For example, the overhead template, described above, is a great way to present questions to students when you’re doing a video-conference.
Showing questions on your screen is similar to projecting them on a whiteboard in a regular classroom environment. In fact, on your screen, you can notate or draw on the questions just like you would with a dry-erase marker on a whiteboard.
There are many free and for-pay drawing programs. While most work with a mouse, you’ll probably find it easiest to mark up a page with your finger or stylus on a touchscreen.
A good free tool is Chrome Web Paint. (See screenshot below.) As its name implies, Web Paint is an add-on to the Chrome browser. The combination should work inside any video-conferencing program, including Zoom, join.me, or Google Hangouts. Other programs have their own drawing tools built in, such as ExplainEverything, LiveBoard, and awwapp.
Important: Chrome Web Paint does not work with a downloaded PDF. Instead, the document must be hosted on a website. A simple solution is to use the button called “Share with students”, which we described above. Then your PDF will be hosted on Problem-Attic. Later, when meeting with students, open the PDF by pasting the link in Chrome’s address bar, and click the Web Paint icon at the top-right. Almost instantly you’ll have a slideshow and a way to draw on your screen.
Converting multiple-choice to free-response
The majority of questions in the Problem-Attic database are multiple-choice. But you don’t have to deliver them to students that way. The program was designed to convert them to free-response, when possible, by hiding the choices.
We say “when possible” because some questions are not convertible. If they’re written like, “Which of the following...”, then of course the choices can’t be hidden. In such cases, the questions are flagged so conversion doesn’t happen by mistake.
There are two places to do the conversion: on the Arrange tab, with the Details button; and on the Format tab, Multiple-Choice panel. The options are shown here:
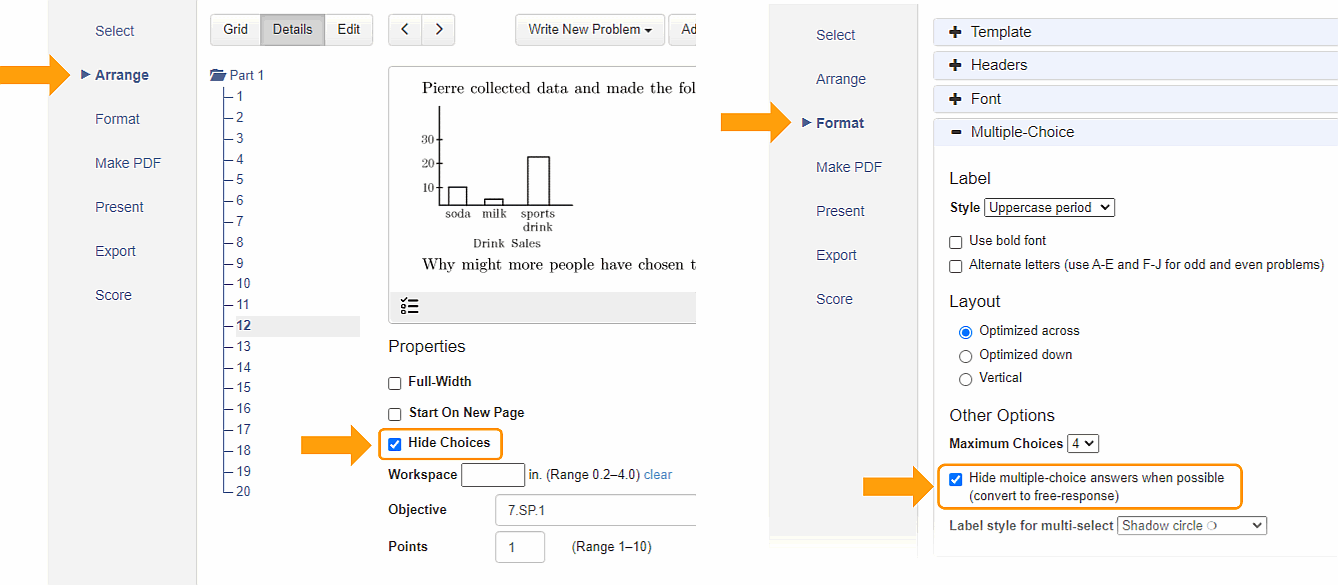
On the Format tab, the option applies to the whole document; you can convert as much as possible with a single click. On the Arrange tab, you can convert individual questions. More details are here. By the way, there is a related option for individual questions, which is converting them to hands-on tasks. That can be done with custom answer spaces, as explained in the next section.
Using smartphones as scanners
When working with students remotely, two issues that often arise are: (1) how to get back their work, and (2) how to score open-ended questions or tasks.
Getting back students’ work is easier than you might think. We know there are inequities with technology; you can’t rely on students having a computer, printer, or internet connection at home. Nevertheless, you can almost always count on students having a smartphone, or access to one.
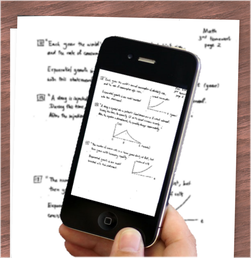
What’s important about a smartphone, which is sometimes overlooked, is that it also serves as a hand-held scanner. A student can submit work by taking a picture of it and attaching it to an email, or by uploading it to various messaging programs like Remind.
If students are not able to print a PDF file that you send them, they should be able to view the questions onscreen and do work on scratch paper. If they send you a picture, this is very similar to turning in homework by dropping it in a basket. You can mark it off in your gradebook program or, if you have time, read students’ answers and send them feedback.
If students can print a PDF, or if you can distribute homework packets to them, then Problem-Attic can delimit the areas where they show their work. This can be done by formatting the questions as cards (see above), or by inserting custom answer spaces. The technique may be a big help if you’re going to look at students’ work. Among other things, you can zero-in on their answers, or students can do that when sending you a picture.
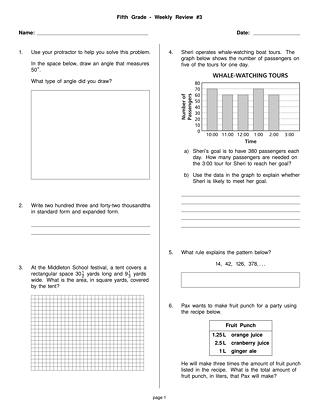
The document on the right shows various types of answer spaces that you can insert: blank lines, boxes, etc. You can even put in a snippet of graph paper or a coordinate system with labeled axes. All of this is done on the Arrange tab by clicking a question and then clicking the Details button. For further instructions, see this page.
By the way, the document on the right is an actual example that we created in Problem-Attic. You can download the PDF and take a closer look at the formatting. Even better, you can see how we made the document. To open a copy in Problem-Attic, click this link: www.problem-attic.com/share/4m62qfq4. The next section tells how you can make your own documents available the same way.
Sharing with other teachers
Problem-Attic has options for teacher-to-teacher sharing. These are all on the Organize page. (Sharing with students is done on the Create page, as described above.) Among other things, you can provide colleagues with links to documents that you create, or you can post the links online.
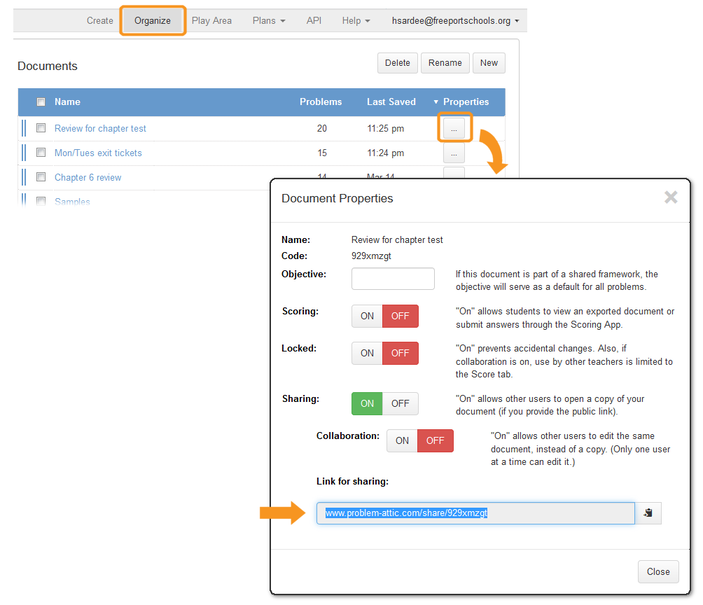
If a teacher clicks a link, then a copy of the document gets opened in that teacher’s Problem-Attic account. This is better than sharing a PDF, because the document can be changed. That is, the other teacher can add or remove questions, re-arrange or re-format them, etc.
The sharing of links is fully allowed under Problem-Attic’s Terms of Service. There are essentially no limits on what you can do with them. You can even embed them in lessons on a commercial website, like TeachersPayTeachers. They’re also totally safe. The reason is that the document is copied when it is opened. Any changes that are made will not affect the original. More details are here.
With links, you can divide up work. Conceivably a small group of teachers can create something like an “at-home curriculum” and make it available to others. The curriculum might include practice and review questions, end-of-unit tests, and also instructional materials, as described above. If you end up producing many documents, you can share them all at once through Problem-Attic’s folder system and framework builder. The options are free and discussed here and here.
We welcome your feedback about Problem-Attic, and we hope you find it to be a very useful program for distance learning. Here is our contact information.