Select Options on the Arrange tab
Problem-Attic has a new button called “Select Options” on the Arrange tab. This can help with document creation in several ways:
- Select all multiple-choice or free-response problems in your document.
- Move certain types of problems into a new part (and add directions).
- Find all problems with custom answer spaces or other formatting details.
- Save paper by grouping together problems that are “full width”.
It’s easy to understand the new button through a couple of examples. Below we’ll show how to quickly divide a document into two parts, and we’ll show how to move larger problems to the end of a part, to prevent unnecessary switching between one and two columns.
Note: The examples below make use of a right-click shortcut in Problem-Attic. In case you didn’t know, this is a fast way to add problems to a document (through random selection). If you want to follow along inside the program, you can use this technique, or you can choose the exact problems you want by drilling down further into the database.
Example #1 - Move all free-response to a new part
-
After logging in to Problem-Attic, start a new document and click on the Select tab to reach your main Select page.
-
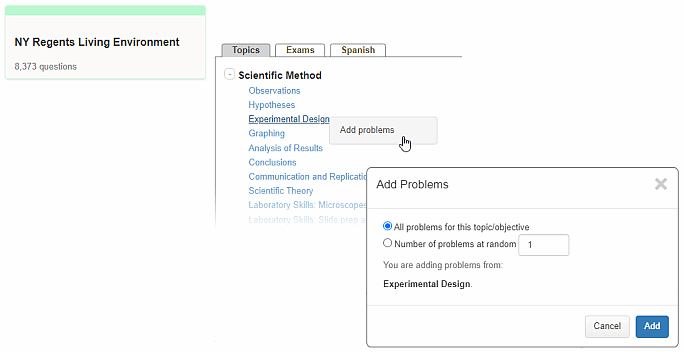
Go to the Browse All Banks page, and scroll to find a bank you're interested in. We'll use New York Regents Living Environment for this example. Click the bank panel to browse the questions within it.
-
Right-click on a topic like “Scientific Method”, or open it up and right-click on one of the subtopics.
-
Click the flyout button that says “Add Problems”. In the dialog, choose 20 problems at random and click Add. If you like, you can repeat this process for a different topic.
Note: The right-click option works at any level. You could, for example, right-click on the Topics tab and randomly select from all of its subtopics at once.
-
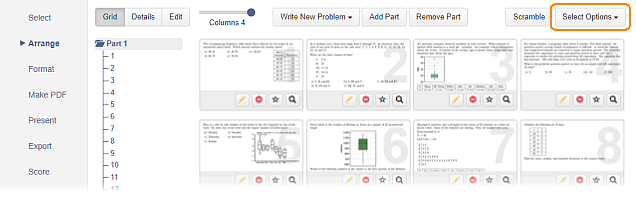
Click the Arrange tab. While looking at Grid view, click the dropdown called Select Options, and choose “Select by...” in the resulting menu.
-
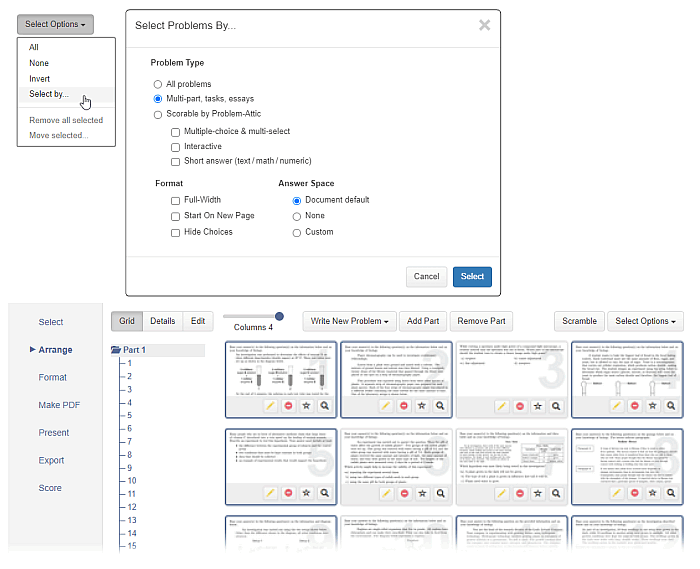
In the dialog box, click the menu for problem type and choose “Multi-part,tasks,essays”. Then click Select. You will now see all free-response problems marked.
-
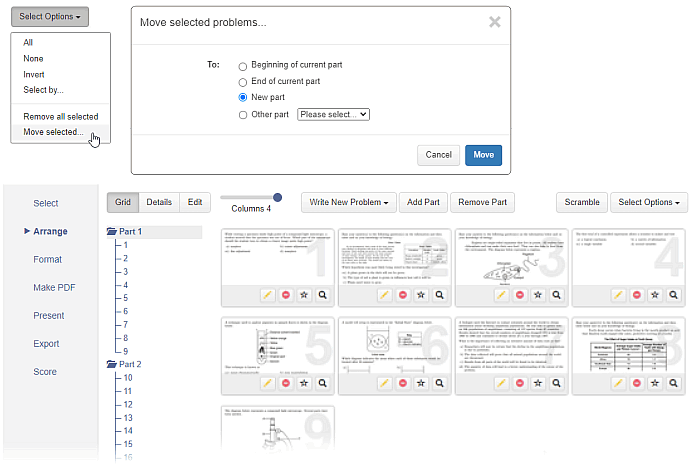
Click the Select Options button a second time. Choose “Move selected...”
-
In the dialog box, choose “New part”. Then click Move. You will now see a second part in the document tree on the left.
-
Click on Part 2 in the document tree, then click the Details button.
-
Type some directions for the free-response part of your document, like “These questions are worth 5 points each. Be sure to show your work.” If you like, you can click on Part 1 and add directions there.
-
Make any other changes you like on the Arrange and Format tabs, then click Make PDF to preview your document.
Example #2 - Find and move all “full width” problems
On a two-column document, Problem-Attic sometimes switches back automatically to one column, creating a T-like layout. This is for certain large problems that don’t look good or won’t fit in two columns. They are marked in the database as “full width”. In fact, you can do this yourself for certain problems by going to Arrange tab > Details.
Sometimes the full-width problems will produce extra space on a page or cause too much back-and-forth switching between columns, as shown in the document preview below (Step 3). This is easy to fix with the new Select Options button. The steps follow.
-
Start a new document and select 20 problems or more, just like in example #1 above.
Note: For this example, you’ll want a mix of large and small problems, and lots of graphics. A good place to get them is the Illustrative Math (IM) bank. Right-click on “Grade 7” to quickly select them at random.
-
Click the Format tab and make sure you’ve got a two-column document. Add a header and make any other changes you like, perhaps to workspace or font style.
-
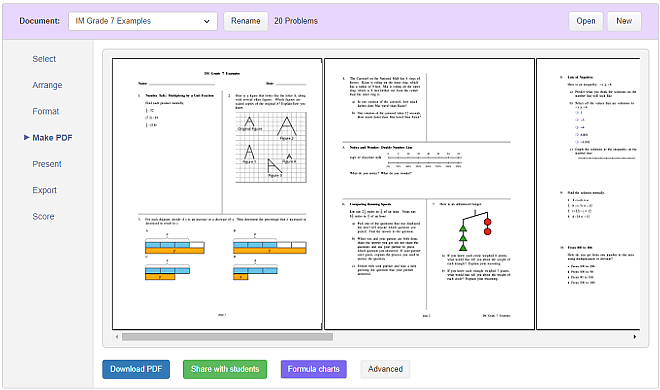
Click Make PDF. Your document will look something like this, with a mix of two columns and full-width problems:
-
To reduce the column switching or for a more efficient layout, click the Arrange tab. Then click Select Options and choose “Select by...”
-
In the dialog, click the option for full-width. Then click Select. A few problems will likely be marked (or you’ll get a message that none were found).
-
Click the Select Options button a second time. Choose “Move selected...”
-
In the dialog box, choose “End of current part”. Then click Move. You will see the new arrangement of problems.
Note: There is no particular reason to create a new part for the full-width problems, but you can do that if you want to add directions above them.
-
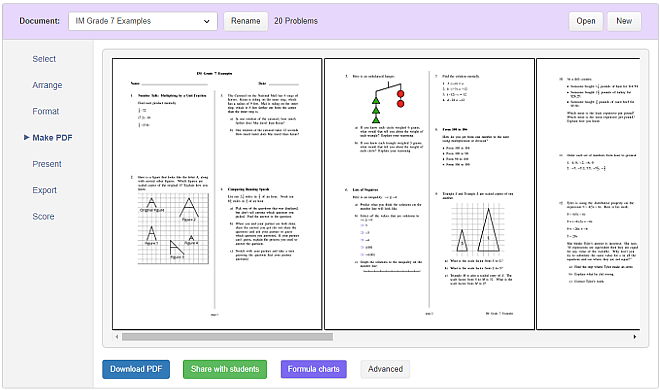
Click Make PDF. Now there should be only one change in columns, and all of the larger problems will be at the end.
Multi-select with Ctrl and Shift keys
In most cases, the Select Options button will be the fastest and most accurate way to select certain kinds of problems. If you want to select them manually, you can now use Ctrl- and Shift-click key combinations. These are customary for what’s called “multi-select”.
The key combinations work on Grid view with any number of columns, although 4 columns (with smaller thumbnails) is better suited for multi-select. To manually select problems, hold down Ctrl and click on one or more thumbnails. Alternatively, to get a continuous range of problems, hold down Shift, then click on the first and last problem that you want.
Important: you cannot drag your selected problems to a new location. Drag-and-drop works for only one problem at a time. However, after doing multi-select, you can use the Select Options button to move the group to the end of the current part or to a new part.