Present tab for slideshows, real-time scoring, and more
Problem-Attic has a tab on the left called Present. It’s the place to go if you want to show questions to your class. The document you’ve created becomes a web-hosted slideshow, which is ready to project and which works with Problem-Attic’s built-in scoring app.
A video overview is here: https://vimeo.com/909316987
There are many uses for the Present tab, including:
- Lessons and in-class activities
- Warmups, exit tickets, and pop quizzes
- Review of a test or assignment that you’ve already given
- Blended learning: rotating students through classroom stations
- Embedding assessment into a lesson; getting real-time feedback from your students
Note: the Present tab can also be used with video-conferencing software like Zoom and Google Meet. This makes it just as useful for remote instruction as for an in-class presentation.
Three types of presentations
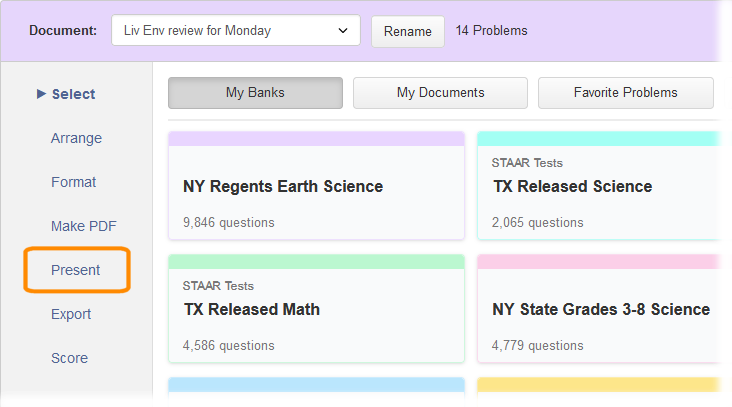
The Present tab is very easy to use. After you’ve selected questions (or opened a document that you previously made), you can instantly turn them into a web-hosted slideshow. All you have to do is click the tab, then click the Launch Presentation button. This opens a new browser window which you can project onto a screen or use with an interactive whiteboard.
As you’ll see, the Present tab has many options. The main option is the type of presentation. There are three types to choose from, using the buttons at the top: Slideshow, Real-time Scoring, and Countdown Game.
Here’s a brief description of each type of presentation.
Slideshow
This type of presentation is most like Powerpoint or Google Slides. It’s designed for in-class activities, lessons and quizzes where you need flexibility to go back and forth between questions. Scoring is entirely optional, as is the use of student devices. If you want questions to be scored, then you’ll provide students with an online answer sheet (see instructions below). They’ll submit answers at the end of the presentation, and results will be shown on the Score tab in Problem-Attic.
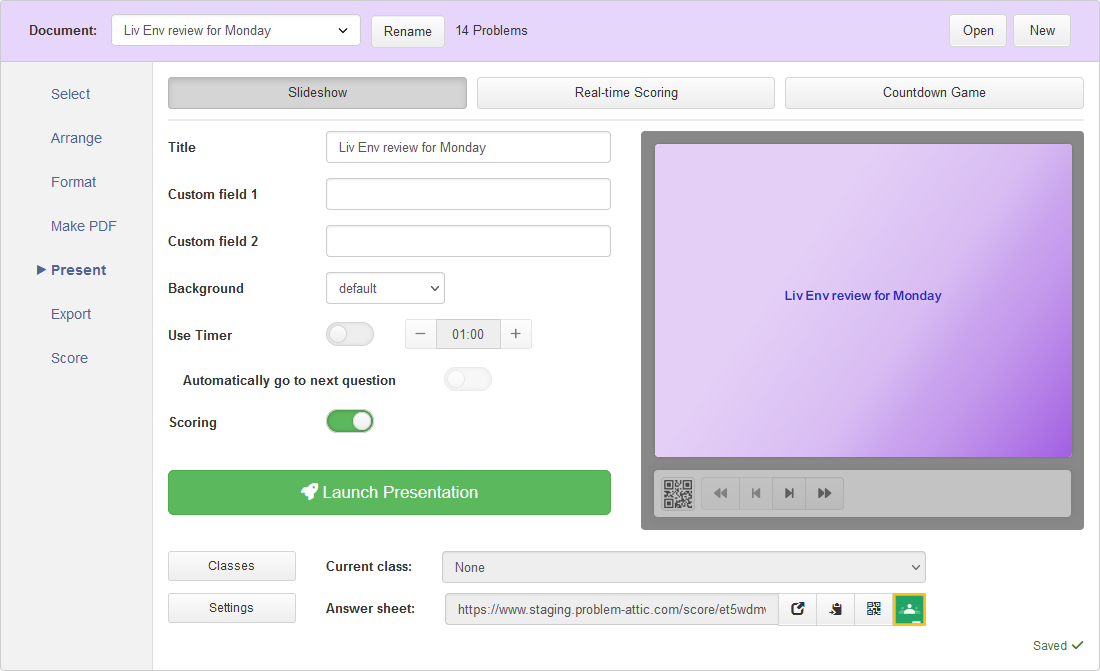
Slideshow options BEFORE and AFTER launch
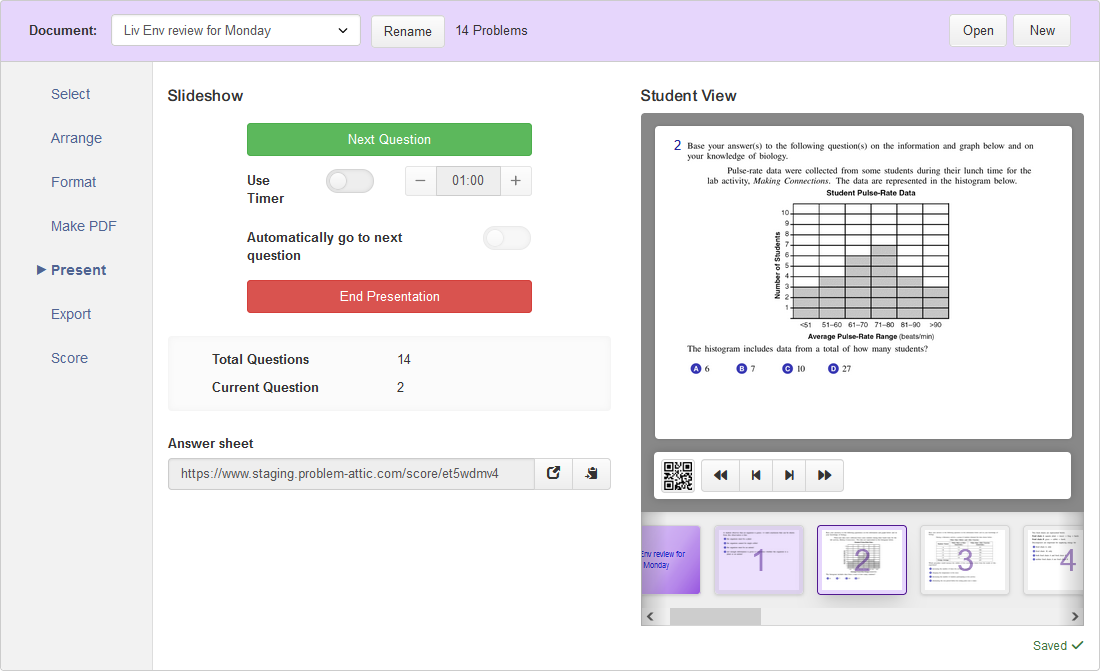
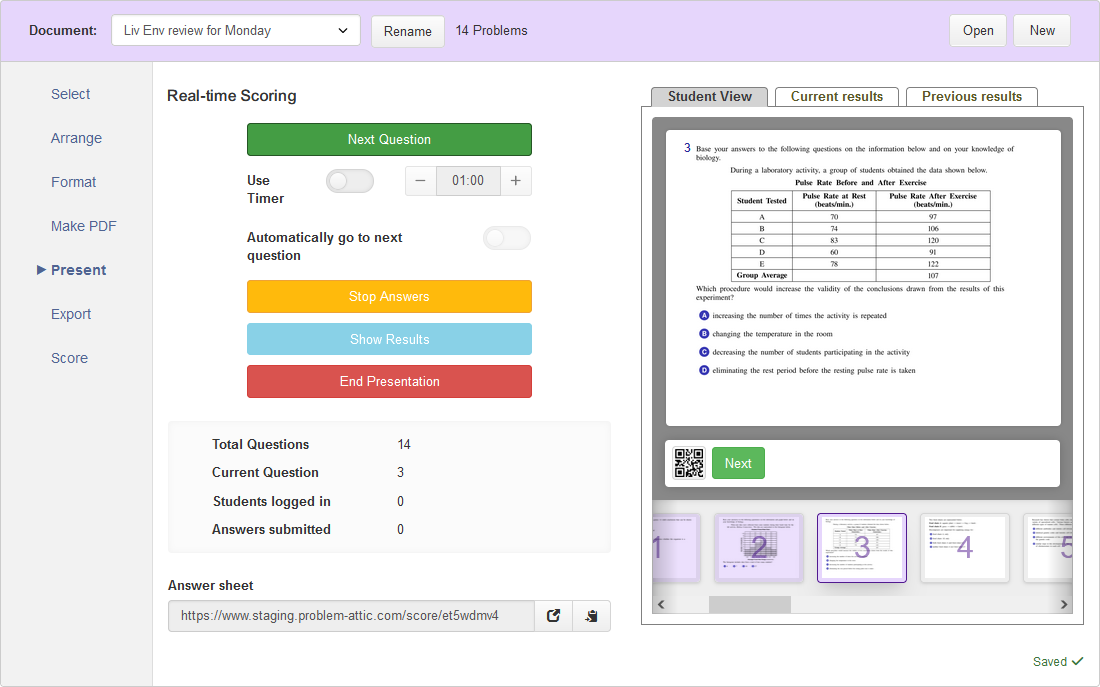
Real-time Scoring
This option is for seeing students’ answers as you present each question. It assumes that students have devices and that you will give them an online answer sheet (see below). After you launch the presentation, you’ll see an option for viewing results. At any time, you can stop answers from coming in. For discussion purposes, you can show results to your class. (They’ll get anonymized.) A key difference compared to a regular slideshow: there’s no going back to an earlier question, and students can’t change answers once you’ve moved on.
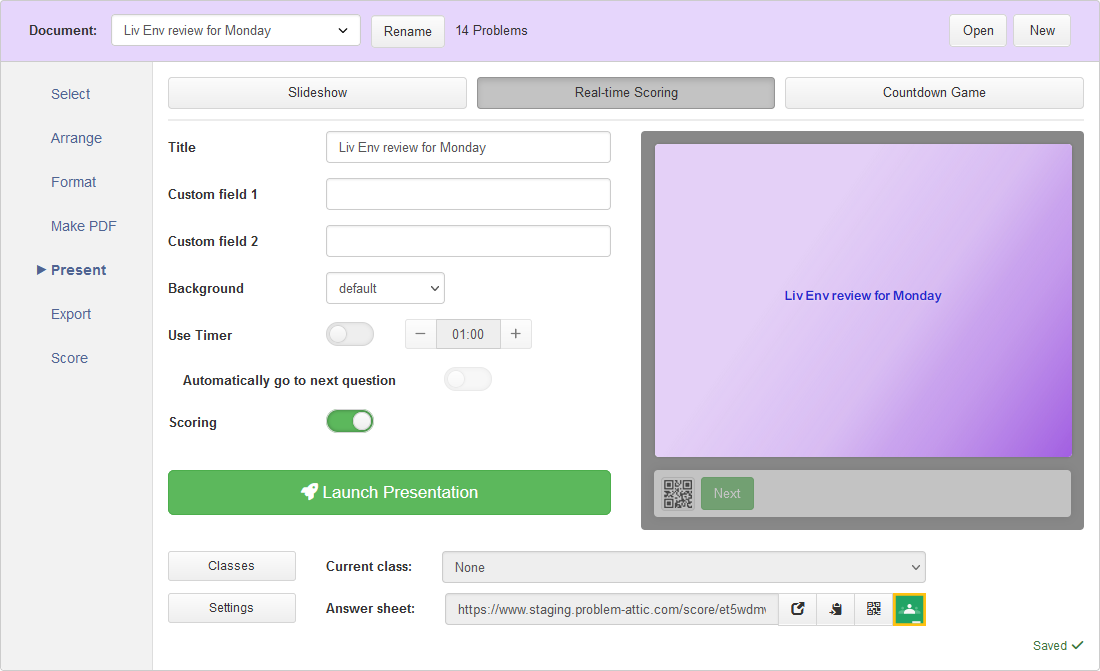
Real-time Scoring BEFORE and AFTER launch
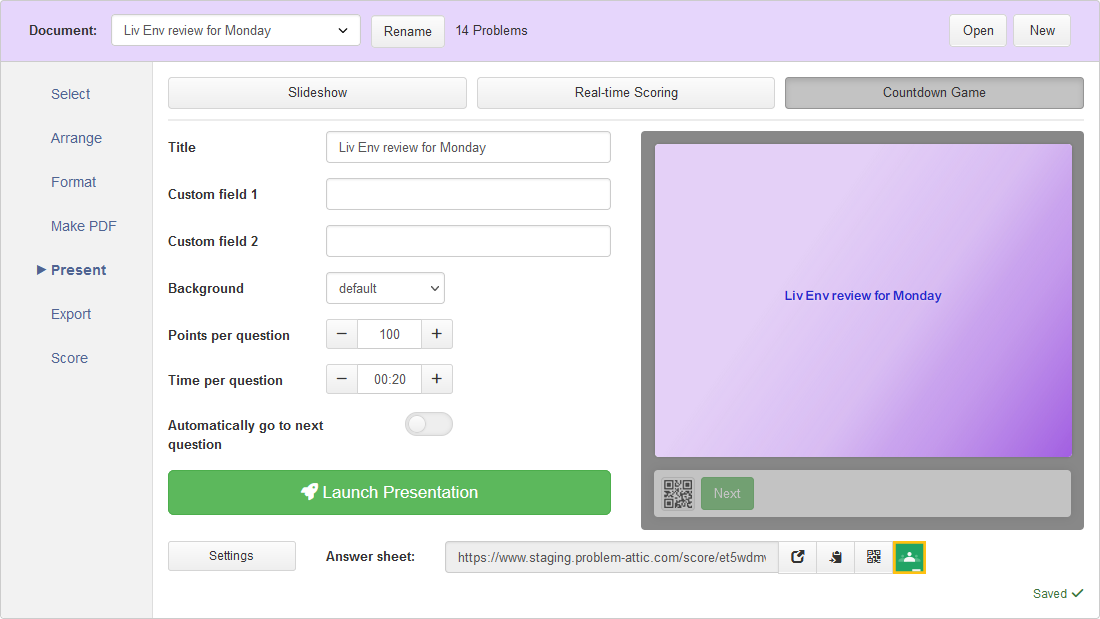
Countdown Game
This option turns a Problem-Attic document into a lively classroom activity. It’s modeled after a common trivia game, and it’s a great way to re-purpose multiple-choice questions for review, reinforcement, challenge and fun! Basically, there’s a point counter which spins down. As it does that, choices fade out and a question gets easier to answer. The game can be used with or without an answer sheet, and it’s not designed for formal assessment. If students do submit answers, only the top three finishers are shown at the end.
Countdown Game BEFORE and AFTER launch
Answer sheets: links and QR codes
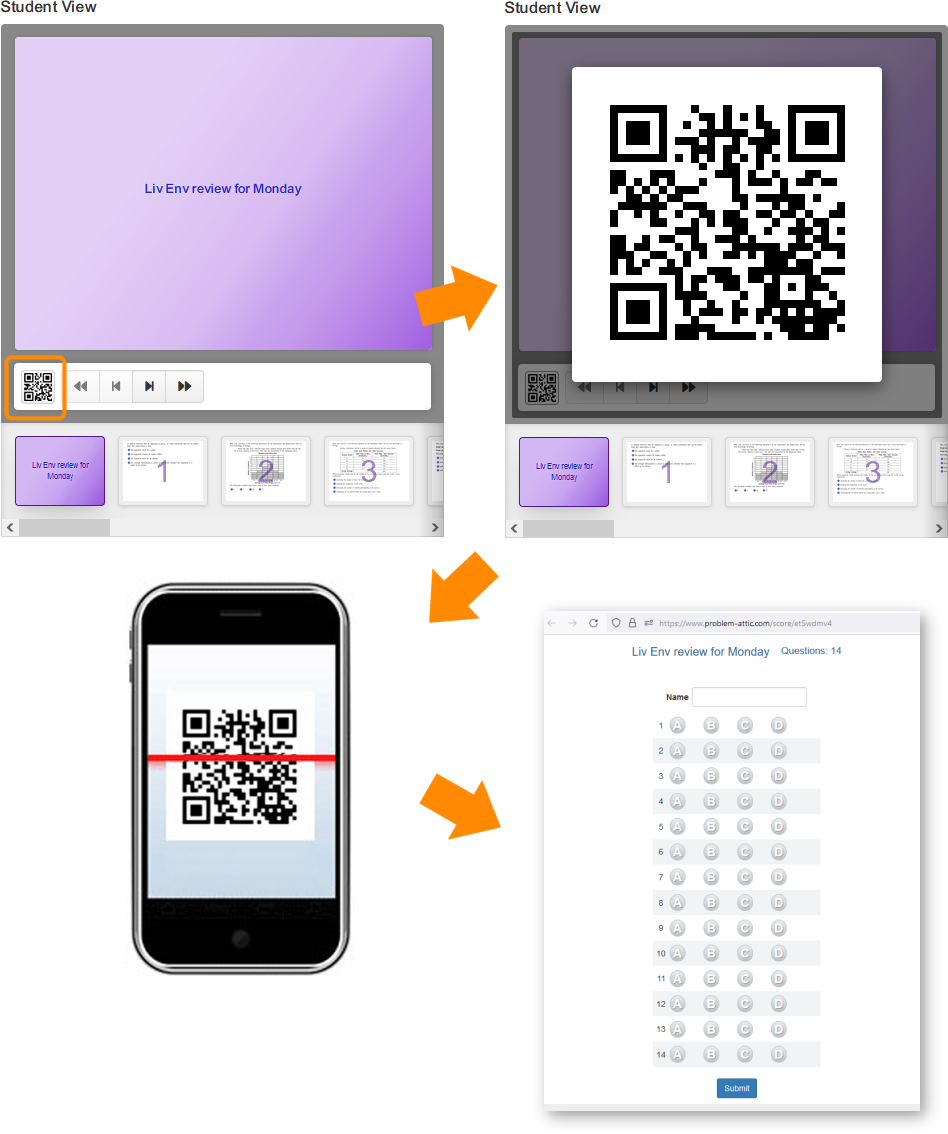
All three types of presentations do scoring in a similar way. They make use of an online answer sheet. You’ll need to provide this to your students using any of the methods described below. Students will open and interact with the answer sheet on their device (phone, tablet, laptop or Chromebook) while you’re presenting questions.
There are several ways of providing students with an answer sheet:
-
Link. The link is shown on the Present tab and is specific to each Problem-Attic document. (It may also be class-specific. See note below.) You can copy the link and paste it into an email, a Google Classroom stream, or an assignment in an LMS.
-
QR Code. The QR code, like the link, can be made available to students through the Present tab. The method will differ slightly before and after you launch the presentation.
-
Pre-launch, you can click the QR code icon next to the answer sheet link. It will appear on your screen, where you can test it, if you like, with your phone. It’s not necessary to do anything else with this QR Code, but you can copy/paste it into a document that you’ll be giving students, perhaps a printed document that goes with your lesson.
-
Post-launch, you can click the QR code icon which appears on the navigation panel. (The navigation panel is described below.) Now the QR code is projected. That is to say, it is overlayed on top of your presentation and shown to your class. Students can then scan it with their device and get the answer sheet.
-
Notes:
-
If you’re going to project the QR code, you’ll normally do this on the title slide of your presentation, before the first question. But you can click the icon and project the QR code at any time, if a student gets disconnected or arrives late.
-
Answer sheet links and QR codes work with the option in Problem-Attic called Virtual Classes. The option is for separating results between classes (and aggregating them later), without having to create separate physical documents. To learn more, see virtual classes.
More details about answer sheets and scoring
In Problem-Attic, any document can be turned into a slideshow, which is to say, the questions can be formatted in such a way that they can be presented to your class. That does not mean, however, that all questions are automatically scorable.
For the Countdown Game, because of its very nature, all questions must be multiple choice. If your document has any questions which are not multiple-choice, you’ll need to remove them before you can click the Countdown Game button.
For a Slideshow or Real-time Scoring, the following types of questions work with an answer sheet:
- Multiple-choice
- Multi-select
- Numeric
- Math formulas
- Short answers
All other types, such as interactive or multi-part, will be treated as “essay” questions. There will be a field where students can enter an answer, but it won’t be scored automatically.
Even when a question is scorable, Problem-Attic may need some help. For math formulas and short answers, it does a string comparison. Spacing differences are ignored, and the comparison is case-insensitive. But any other slight differences can cause a correct answer to be marked as incorrect. Short answer strings are particularly susceptible to mistakes in scoring. For the most reliable results, you might try to do automatic scoring only when short answers are just a word or two.
Important: for math formulas, short answers and essays, you can override Problem-Attic’s automatic scoring. To do that, go to the Score tab and click Student view. Then hover over the question number at the top of a column and choose “Score this question manually” in the drop-down menu. To learn more, see this help page.
Student login and other settings
For a Slideshow and Real-Time Scoring, you can set many options for answer sheets. To do that, click the Settings button on the Present tab.
One of the most important options is called “Student Login”. By default, for privacy reasons, Problem-Attic asks students to provide only their name on the answer sheet. If you turn on Student Login, which can be done through Google or ClassLink, then Problem-Attic is able to authenticate the student and also get an email address. This information is used only for reporting results and it’s automatically deleted after no more than 180 days. For more information, please see student login.
If students won’t be doing a formal login, you can still ask for more information from them when they are given an online answer sheet, including separate first and last name, ID, teacher and class. That is done at the bottom of the Settings dialog. The information may be useful if you’re going to export results to a gradebook program afterward. Please note that certain programs are supported in Problem-Attic, and if you select the vendor, you can download a specially-formatted CSV on the Score tab.
Another option worth mentioning is Format. For a Slideshow, you can decide if the answer sheet should be “continuous” or “one per page”. The latter means that students will answer just one question at a time, then click or swipe to go on to the next question. There are tradeoffs in terms of compactness and the size of answer fields. You might try the layouts and see if you prefer one over the other, or you might switch between them for different kinds of questions.
Please note: The Format option does not apply to Real-time Scoring. Those answers are always done as “one per page”, because they have to be synchronized with the question which is currently being presented.
For Countdown, there’s no login option or additional student information fields. The game is meant to be informal, and students will type only their name or an alias. Also, like Real-time Scoring, answer layout will always be “one per page”.
Navigation and making your presentation “self running”
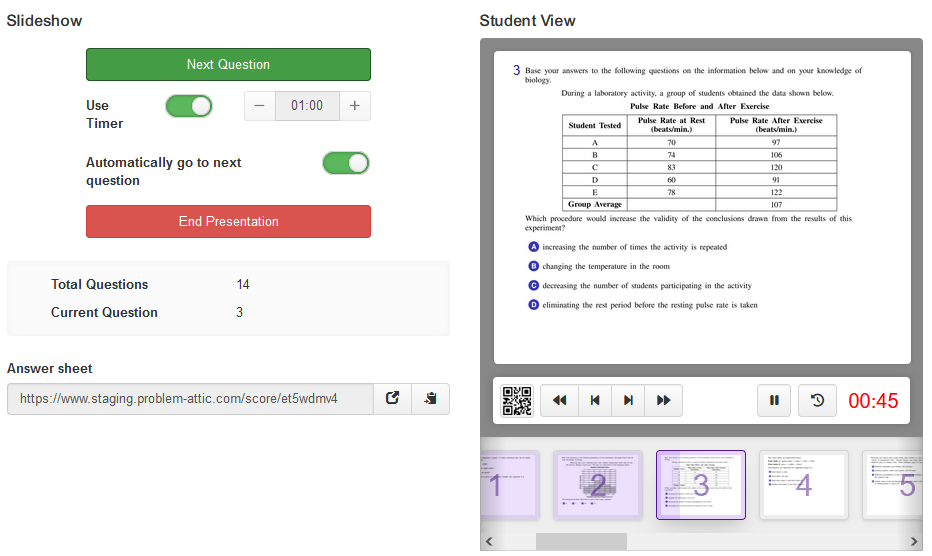
After launching a presentation, the Present tab will change. On the left you will always see a button for Next Question and for End Presentation. For Real-time Scoring only, you will also see buttons for stopping answers and for showing results.
On the right will be a smaller version of what’s being projected. It is labeled Student view. Below are additional control buttons. These same buttons are on the presentation, which means, if you have an interactive whiteboard in your classroom, it can be where you click Next Question. Otherwise, all control will be in Problem-Attic on the Present tab.
For a Slideshow and Real-time Scoring, there are thumbnails below the student view. These behave differently for the two types of presentations. For a Slideshow, you can click on a thumbnail to jump to a different question. That is, whatever you click on will be shown to students. For Real-time Scoring, the thumbnails are there only for reference purposes. You can click on one to enlarge it, but the presentation is designed so that you always go forward from one question to the next.
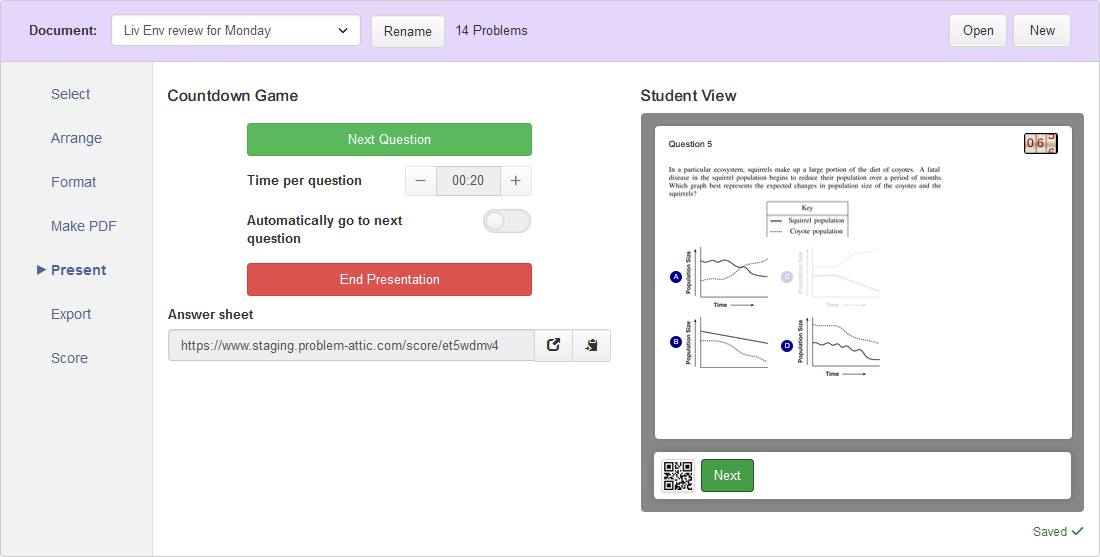
All three types of presentations can be made self-running. That is one purpose of the option, “Use Timer”. (For Countdown, it also affects the point value.) If you turn on the timer and also turn on the option that says, “Automatically go to next question”, then the presentation will run without your having to control it. This might be useful if you’d like to walk around the classroom and help students while they’re answering questions.
When timer is on, there will be buttons for pausing and resuming it. Please note that the timer, by itself, does not affect the presentation. For Real-time it will stop answers from coming in. Otherwise, to continue the presentation, you need to click “Next Question”, or turn on the option “Automatically go to next question”. Also note: clicking Next Question will reset the timer and it will start running again (if turned on).
Self-running presentation: Real-time Scoring with a timer
For Real-time Scoring, there are some key differences, when compared to Slideshows:
-
You can go in one direction only, which is forward. There is no option for going back to an earlier question. Similarly, if you click Stop Answers, there no way to restart them for the current question.
-
Student are not allowed to change an answer after they’ve submitted it. For this reason, clicking on a choice is not the same as submitting; students need to take the second action when they’re sure of their answer.
-
Answer sheets are synchronized with the question which is currently being shown. If students have not submitted an answer, it will be too late for them to do so when the timer runs out, you click Stop Answers, or you click Next Question.
-
Besides the Student View, there are tabs for looking at current and previous results. On the “Current results” tab, you’ll see students’ names and answers as they are being submitted. This is for the question that is currently being presented. On the “Previous results” tab, you’ll see summary of scores for previous questions without a student-by-student breakdown.
-
As an option, after the timer runs out or after you click Stop Answers, you can click the button labeled Show Results. This will project onto the screen a list of scores for the current question. The scores will be anonymized, meaning students’ names won’t be shown. So this is a very safe option and may be useful for a discussion about the question or answers.
We hope you like the options on the new Present tab. Please contact us if you need any assistance or would like to provide feedback. Thank you!