Adding or Removing a Formula Chart
Problem-Attic has hundreds of formula charts that you can add to any PDF document. The charts come from state assessments, NY Regents, and U.S. and international exams. They are organized by grade, subject and year, so it’s easy to find the one you want.
After creating or opening a document in Problem-Atitic, go through the steps below to add (or remove) a formula chart.
Add a Formula Chart
-
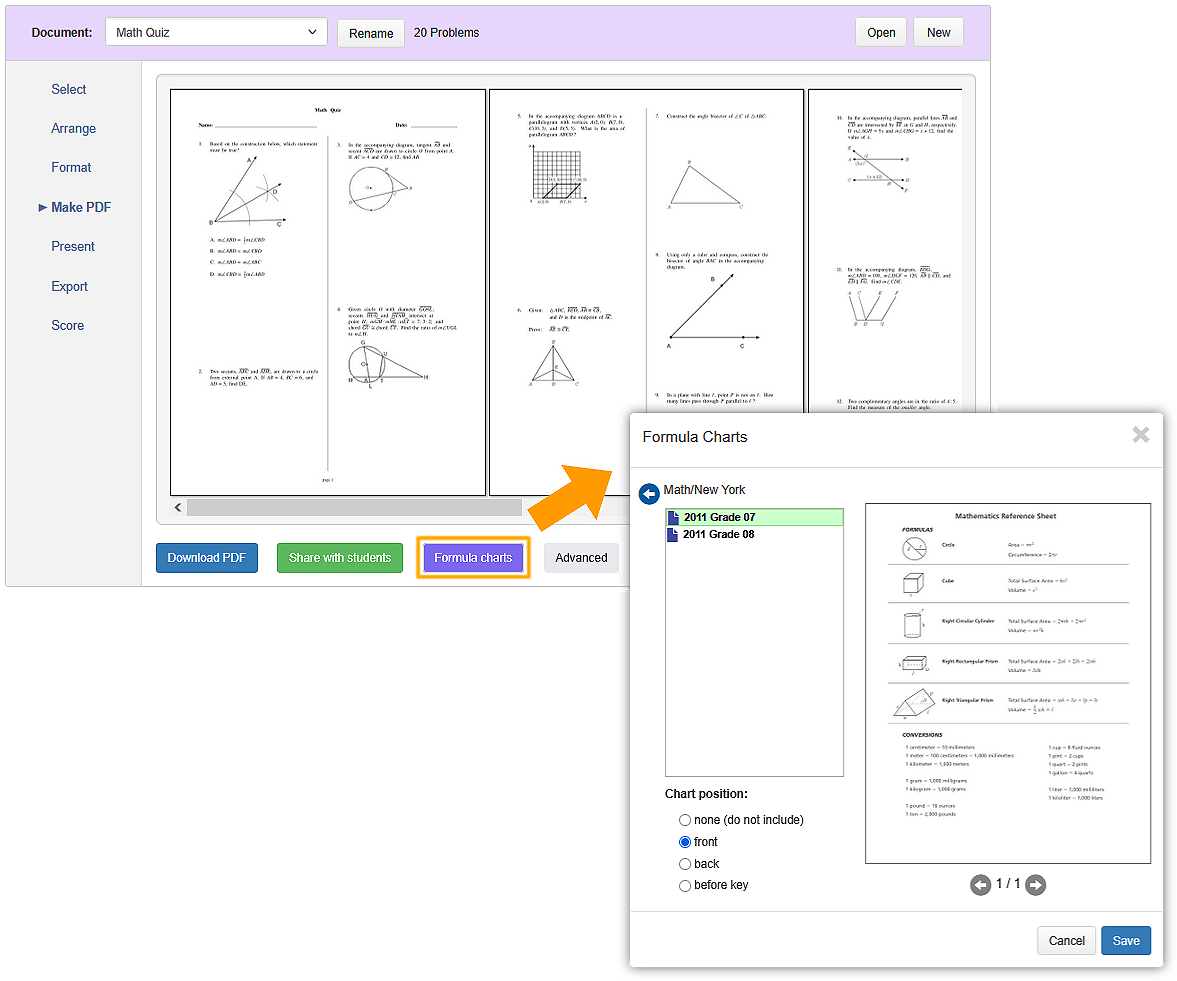
Click Make PDF to preview your document.
-
Under the PDF preview, click Formula charts. This will open the Formula charts dialog box.
-
The charts are contained in folders on the left. Click through the folders to see what charts are available.
-
Click a chart to preview it on the right side of the dialog box.
Note: if the selected chart has multiple pages, you can cycle through them using the arrow keys below the preview. All pages of the chart will be added to the PDF.
-
After selecting a chart, you need to tell Problem-Attic where to add it to your PDF. Choose one of the following under Chart position:
front — insert the chart at the beginning of the PDF.
back — insert the chart at the end of the PDF.
before key — insert the chart after the last page of questions and before the answer key.
Note: If your document doesn't have an answer key, the “back” and “before key” options will have the same effect. The other option which is shown, “none (do not include)”, will remove the formula chart from your document.
-
Click Save. Problem-Attic will update the PDF preview with the new formula chart.
Remove a Formula Chart
-
Click Make PDF to preview your document.
-
Under the PDF preview, click Formula charts.
-
Below Chart position, select none (do not include).
-
Click Save. Problem-Attic will update the PDF preview and remove the formula chart.