New Assessment Manager
This page documents the pre-release version the Assessment Manager. It is for teachers who are at schools that subscribe to Problem-Attic and who would like to try the new options and provide feedback.
Please note that the Assessment Manager is an add-on to Problem-Attic and not automatically included in a school subscription. It is designed for common benchmark assessments (CBAs), final exams, and other tests which are administered by multiple teachers across multiple schools. For that reason, it assumes uniform licensing of Problem-Attic in a district. When all elementary and/or all secondary schools have a subscription, then the Assessment Manager gets activated.
(If a school subscribes to Problem-Attic apart from a district, there are still ways for teachers to administer tests to different classes and view results. They can use a feature called “virtual classes” on the Export and Score tabs. Instructions are here: www.problem-attic.com/help/export-tab/virtualclasses.)
Creating and Delivering an Assessment
Follow these steps to create a district-wide test, set a testing window (optional start and end times), and send test links to teachers.
Step 1. Create a test as normal in Problem-Attic.
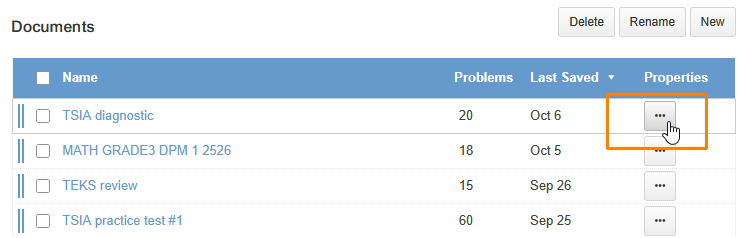
Step 2. Go to Organize page and click the 3-dot button next to the test. In the dialog, turn on sharing and copy the document link to the clipboard.
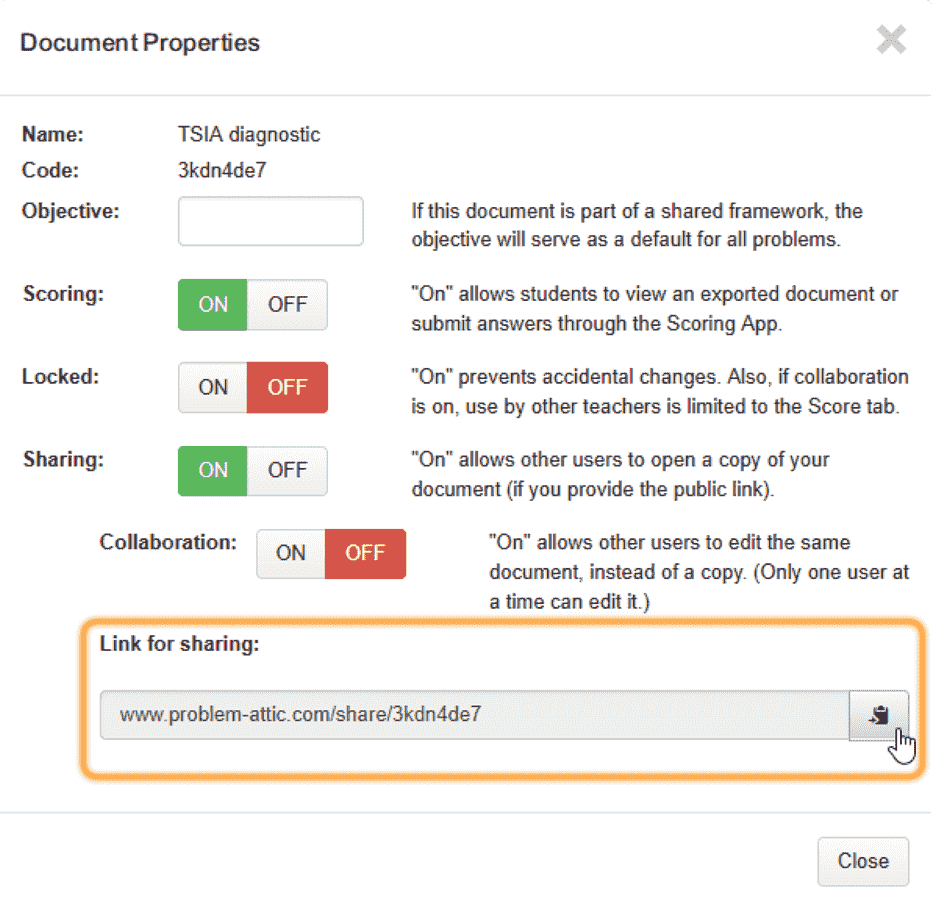
Note: you can also make use of a sharing link that is provided by another Problem-Attic user. The test does not have to be originally created in your account.
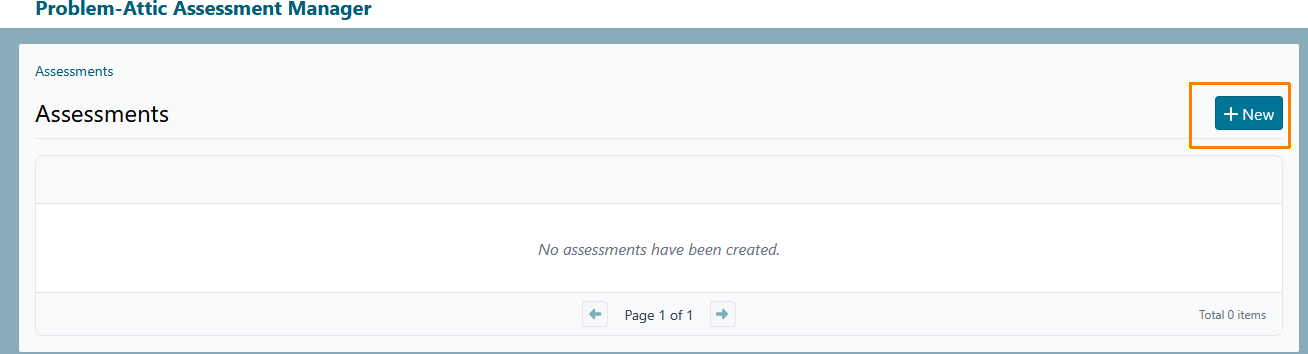
Step 3. Click your user ID (email address) at the top right. In the pop-up menu, choose new option called “Assessments”.

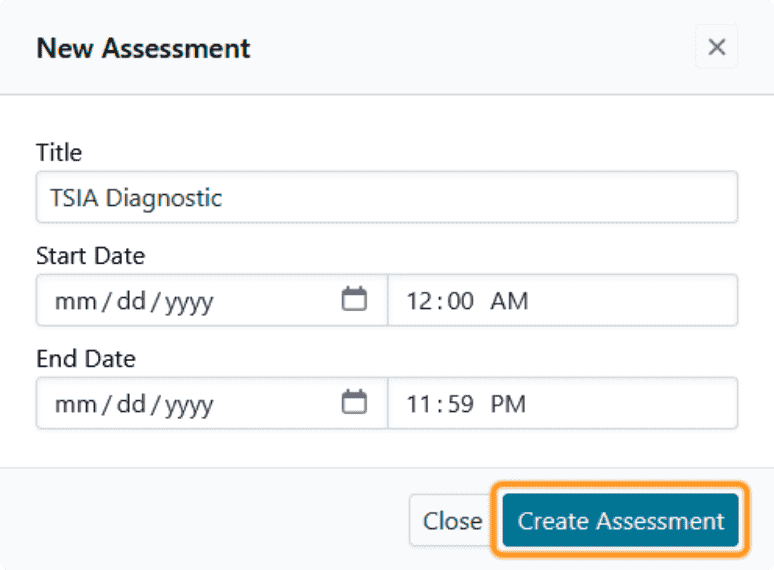
Step 4. At first the list of assessments will be empty. Click the New button.
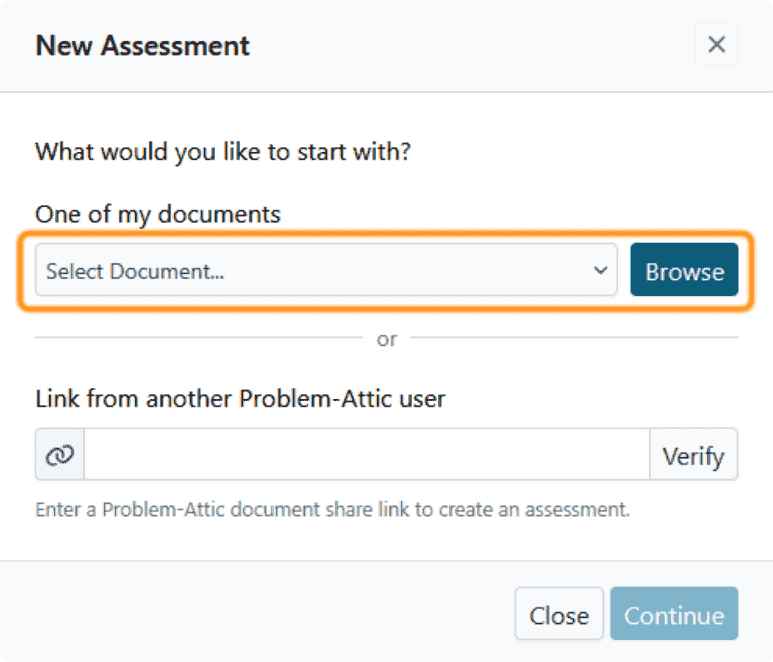
Step 5. In the dialog, use Ctrl-V to paste the document link into Source. Then click Verify.
Step 6. Information will be filled in for the assessment. You can set an optional testing window (start and end date) in the dialog or do that later. To continue, click Create Assessment.
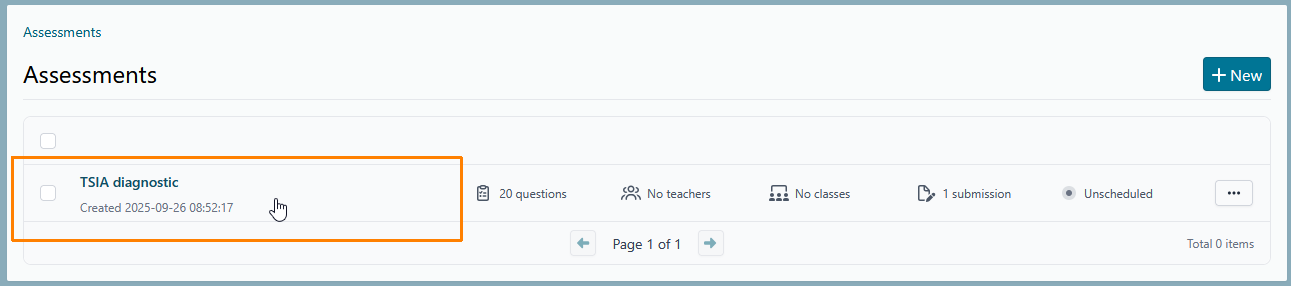
Step 7. You will see the new assessment in the list. Click anywhere on the row to continue. Or click the 3-dot button to the right and choose Settings from the menu.
Step 8. Currently, the Assessment Manager will use test settings from Problem-Attic. In the future, you will be able to override them here on the Settings page. For now the only options you may want to change are the start and end times. These restrict the testing window and can be left empty. As long as the Scoring switch is on, students can take the take the test and submit answers.
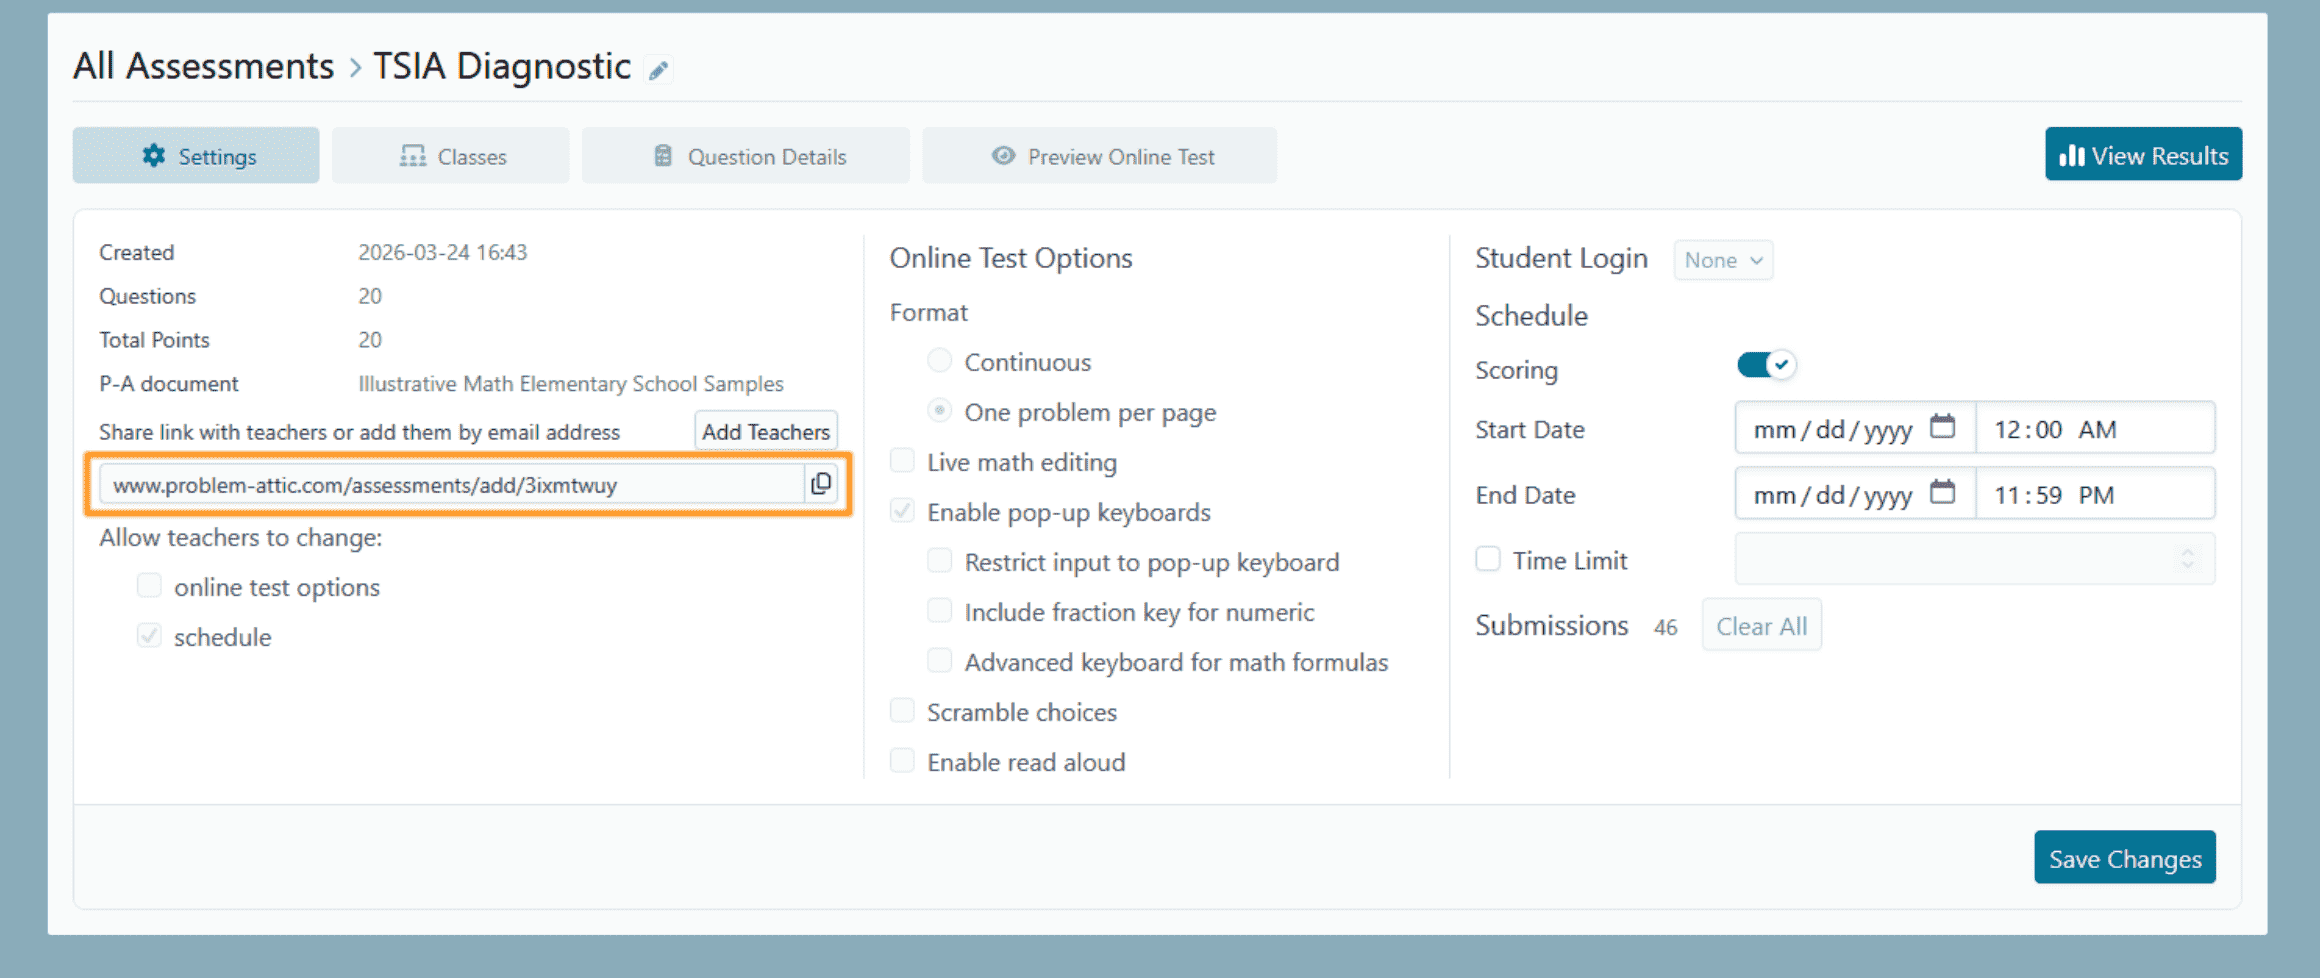
Step 9. To continue, click the Add/Email Teachers button.
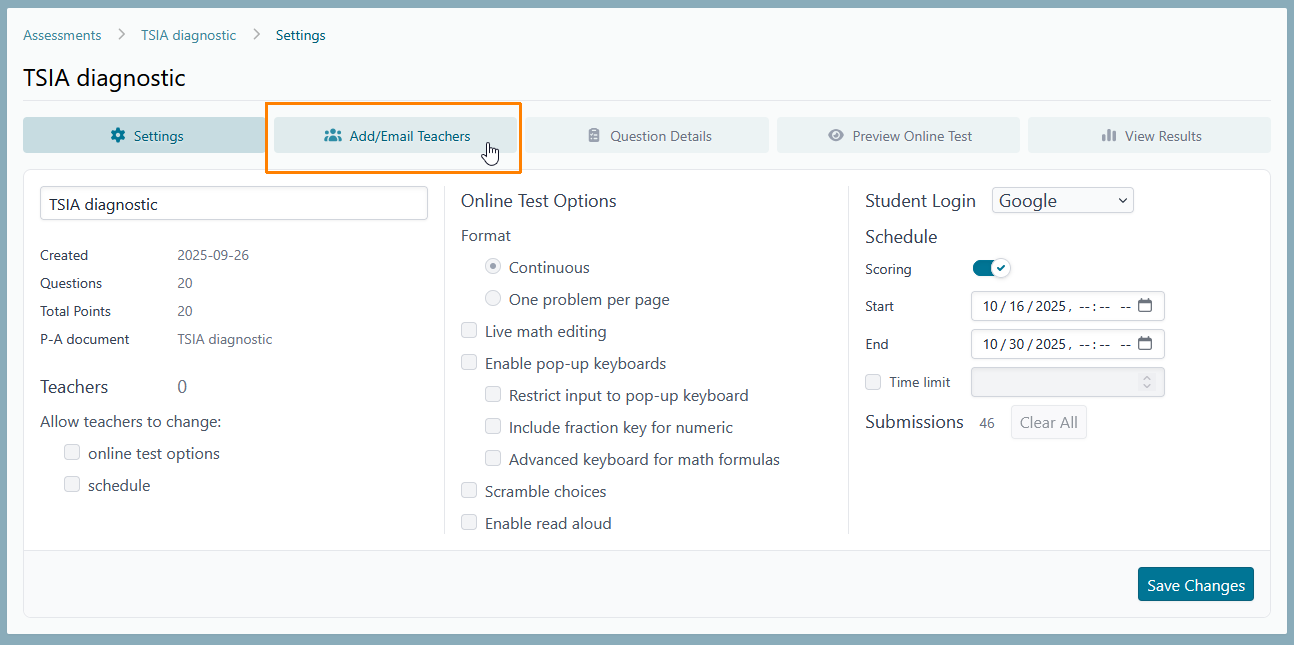
Step 10. At first the list of teachers will be empty. You need to add addresses for those teachers who will be administering the test. Important: they must all be registered users of Problem-Attic and associated with your school district.
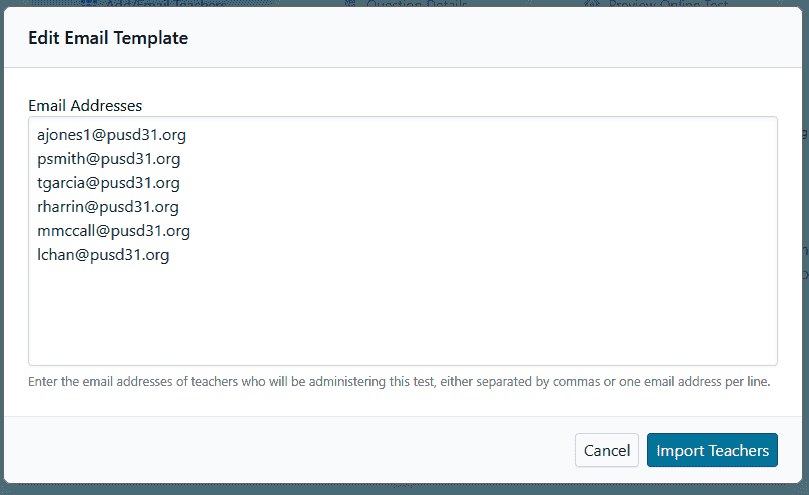
Click the Add button. In the dialog, you can paste many addresses at once separated by commas (or one per line). Click the Import Teachers button when done.
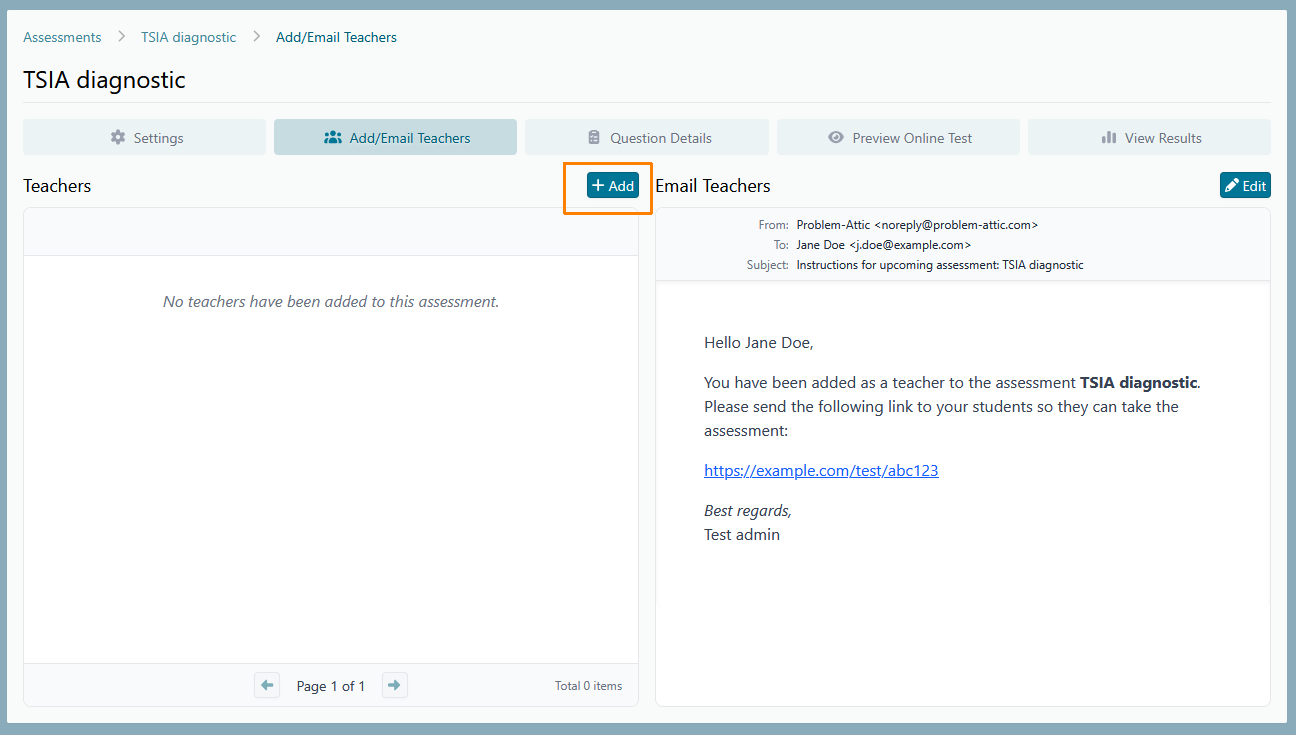
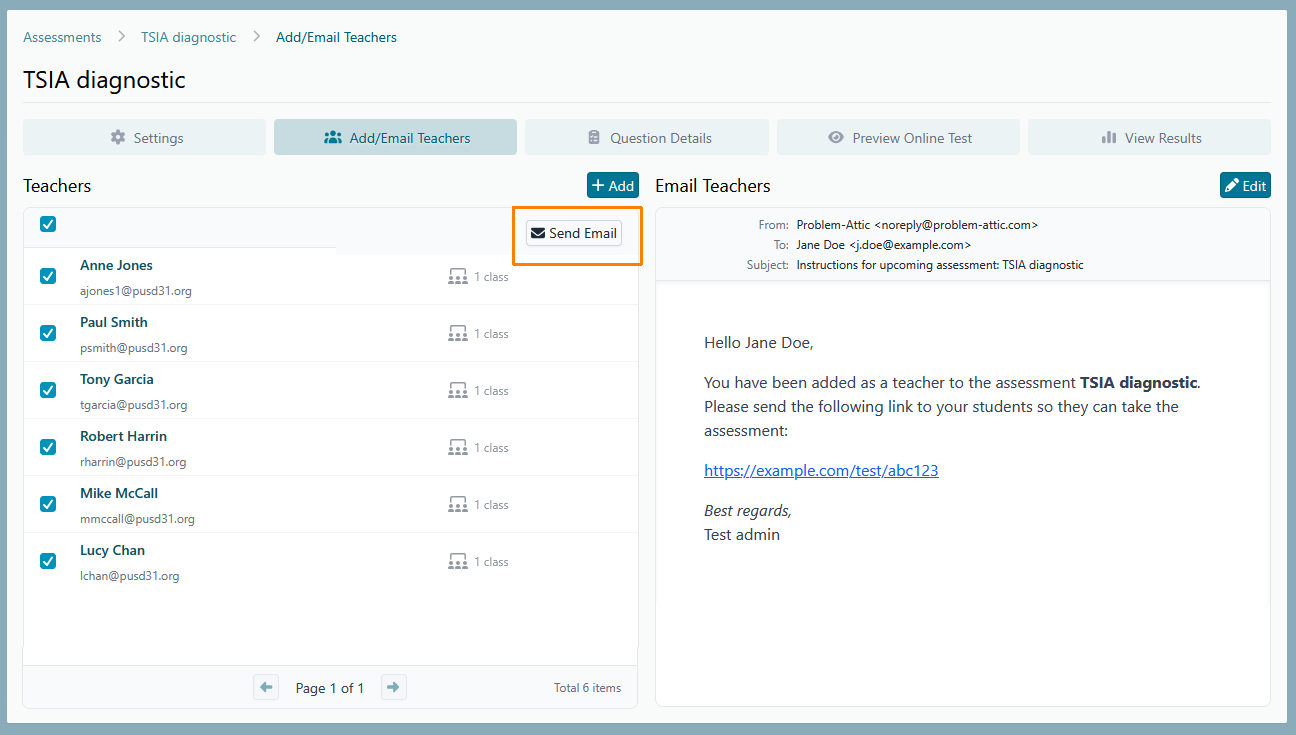
Step 11. The Assessment Manager will send to each teacher an email with a unique link to the test. Teachers will then provide the link to their students. You decide when the email gets sent. Also, you can change the wording and subject line of the email. To do that, click the Edit button.
Basically, editing the email is like using a “mail merge” feature in a word processor. There are four special fields called “tokens” which Problem-Attic fills for each email: your name, teacher (recipient) name, assessment title, and test link. You can insert these tokens through the drop-down menu. The test link is the only one which is required. It must appear somewhere in the email. If you do any editing, click the Save button when done.
Step 12. When you are ready to send the email to teachers, select some or all of their names in the list, then click Send Email.
Step 13. Teachers are responsible for getting the test link to their students. They can do it in any number of ways, through Google or a Learning Management System (LMS), through their own email, or through any messaging system.
Step 14. Students click the link to take the test. They will need to log in (authenticate themselves) through Google. When they are finished answering questions, they click the Submit button.
In short, test-taking is essentially the same as for any online test made by Problem-Attic. The main difference is that results will not appear on the Score tab in Problem-Attic. Instead, there is a new way to view results through the Assessment Manager.