Problem-Attic Redesign – October 2015
This document describes the recent redesign of Problem-Attic. It can serve as a reference for experienced users and an introduction for those who have just discovered the program.
1. Main menu
The main menu at the top of the screen has replaced the Home, Browse and Help icons.

Create is where you do most of your work in Problem-Attic: select, arrange and format questions, and make PDFs. If you’re a subscriber, it’s also where you do export and scoring.
Organize is the new name of the documents home page. This is where you see all documents, put them in folders, and get links for sharing with other teachers.
Plans has information about single-user and school subscriptions. Click this menu item to learn about export and scoring and to get details about each type of subscription.
Play Area is where you can try nearly all of the subscription options. It’s a special part of Problem-Attic that looks and works like Create but with a smaller database of about 2500 questions.
Help has detailed instructions for using Problem-Attic. Help pages are organized topically, like a reference manual. There are also step-by-step guides for many common tasks.
Account shows your user ID (email address). It’s a drop-down menu. Go there to change your program settings or billing information (if you’re a subscriber), reset your password, etc.
2. Create
On the left of the Create page are six tabs. These correspond to the tabs and buttons which, in the previous version of Problem-Attic, were near the top of the screen.

Generally you’ll click through the tabs in the same order as before: Select ▶ Arrange ▶ Format. Of course, you can go back-and-forth as much as you like and make changes. The document bar at the top is new. It is described in the next section.
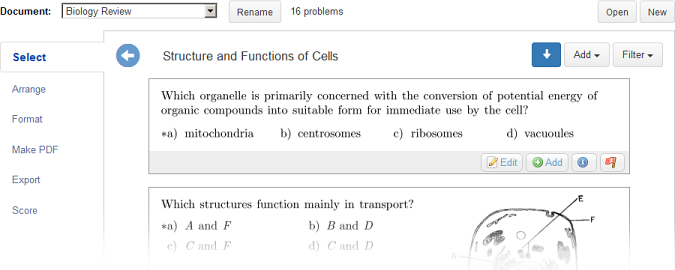
The Select and Arrange pages are the same as before, except for two changes: you click the blue circled arrow to go up a level, and you’ll see a new Scramble button when arranging problems.
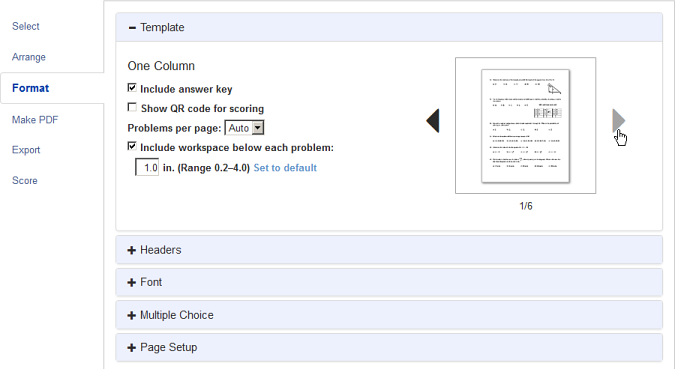
The Format tab presents the same options as before, but now they are organized vertically in groups. To expand/collapse the groups, click on the title bars where you see + and − symbols.
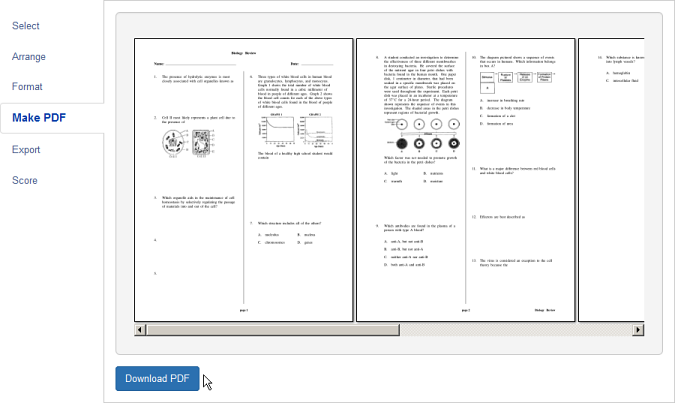
A big change from the previous of Problem-Attic is Make PDF. This tab replaces the Preview button. When you click the tab, you’ll see how the pages of your document got formatted. If you like what you see, simply click the Download button. Or you can click other tabs, make changes to your document, then click Make PDF again.
The Export and Score tabs are for single-user and school subscribers. If you’re not a subscriber, you can try them in the Play Area.
The Score tab shows the same options as what used to be in a separate browser window (“the scoring app”).
The Export tab replaces the dialog boxes in the previous version of Problem-Attic. Many of its options are new. For details, please see the section below.
3. Document bar
The “Document bar” allows you to switch between recent documents, rename the one you’re working on, or open or start a new one without leaving the Create page.

Please note that there are additional document options on the Organize page. In particular, you can delete documents and put them in folders. Also on the Organize page, you can get a “public link” for a document for sharing with another teacher. See online help for more information.
The drop-down list to the left of the Document bar shows the last 5 documents that you worked on. Select one of them to make it the current document.
The Open button lets you browse for any document that you created (not just the last 5). It also shows your folder system (if you’ve created any on the Organize page), and it has a handy filter for searching for a particular document by name.
The New button lets you create a blank document or a copy of an existing document.
4. Export
The Export tab has most of Problem-Attic’s newest technology features. It is for single-user or school subscribers. Click the tab to create a slideshow or online test, to post a link to a document, or to export a quiz to your LMS.
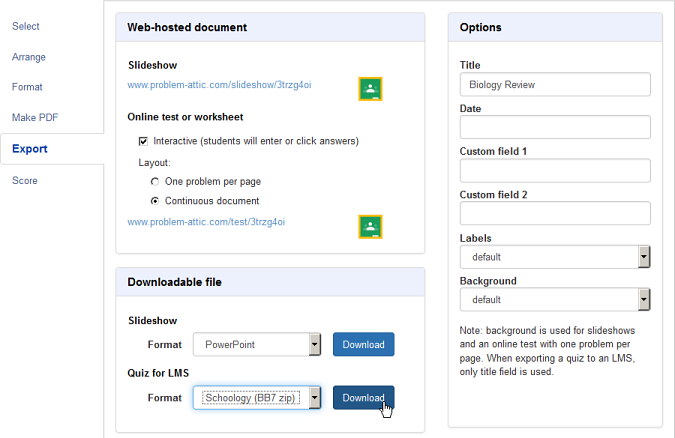
Note: in the previous version of Problem-Attic, the term Slideshow was used for both presentation by the teacher and delivery of questions to students. Now the term is used solely for presentation on a whiteboard or for a downloadable file, such as PowerPoint.
The new option called Online test/worksheet is for delivery of questions to students. It supports all internet-enabled devices (laptops, Chromebooks, smartphones and tablets) and is good for both in- and out-of-class activities, including tests, quizzes, and homework. For that reason, it’s a very good option for blended learning.
Another change from the previous version are the document links, which are live as soon as you go to the Export page. You can click the slideshow link, for example, to open it in your browser. Or you can highlight and copy a link to an online test/worksheet (often with Cmd-C or Ctrl-C), post it on your website, or email it to students.
Note: if you wish share a document with other teachers, you should use the “public links” that are available on the Organize page. More info
On the right of the Export page are various options for title slides, backgrounds and labels. These mainly apply to the web-hosted and downloadable slideshows. If you click the label menu, for example, you’ll see most of the options are for SMART and Promethean; they correspond to those programs’ native files and to the buttons on clickers. See Problem-Attic’s online help for more information.
5. Online tests and worksheets
This type of export is an alternative to PDF files. It is intended for delivering questions to your students, as stated above. There are three options:
Interactive. Choose this option if you would like students to enter free-response (or essay-like) answers, or click choices. If “Interactive” is checked, then further options are available on the Score tab, such as showing results to students. If “Interactive” is not checked, then the online test/worksheet is still a good way to go paperless; you’ve simply turned off automated scoring.
One problem per page or continuous. The first option, one problem per page, will make your online test/worksheet appear very similar to a slideshow. Problems will be automatically resized to fit on the screen, and students will advance through the document by clicking the navigation bar or by swiping. If the document is continuous, then there will be no resizing of problems and student will advance by vertical scrolling.
Upload to Google Classroom. You should use this option if you are a registered user of Google Classroom and you want stream a document link to your students. After clicking the icon, you’ll be prompted to sign in (if not already), and you’ll see options for creating an assignment and providing instructions to students. Please see Google’s documentation for more details.
6. Export a quiz to an LMS
This option lets you deliver questions to your students through two common learning management systems, Canvas and Schoology. (Support for other LMS file formats is coming soon.)
To export a quiz, you’ll need to do a file download then an upload into the other system. The download part is very quick—just the press of a button. There are a few additional steps for upload (import). For detailed instructions, please click here
7. Play Area
You can try all of the options described in this document in what’s called the Play Area. Please click the link in the main menu if you’re interested in blended learning, flipping your classroom, or just going paperless. We think you’ll be surprised at how easy it can be to deliver questions electronically, either directly through Problem-Attic or through Google Classroom or an LMS.
We welcome your feedback. Please let us know what you think of these new options or how we can make Problem-Attic even better. You can email us at support@problem-attic.com.