Importing text into the problem editor
 The feature described below is available by
subscription.
It can be tried out for free in the
Play Area.
The feature described below is available by
subscription.
It can be tried out for free in the
Play Area.
This tutorial shows the basic steps for importing text from a word processing document into the editor in Problem-Attic.
Please note that it is not possible to import anything other than plain text. Tables, graphics, math formulas, and many special symbols need to be inserted directly into the editor. Also, font effects such as bold and italics need to applied after import.
-
In your word processor, open the document that you want to import.
-
Save the document as plain text. If there are options for saving, do not preserve line breaks, and choose Windows Western or Basic Latin for the character set.
-
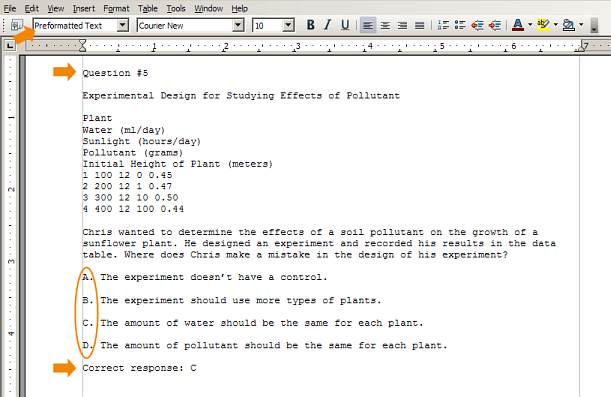
While still in your word processor, open the plain text document that you just saved. The picture below shows how our sample problem now appears. Depending on how the document got converted, you may see different line breaks and artifacts than what is shown here.
-
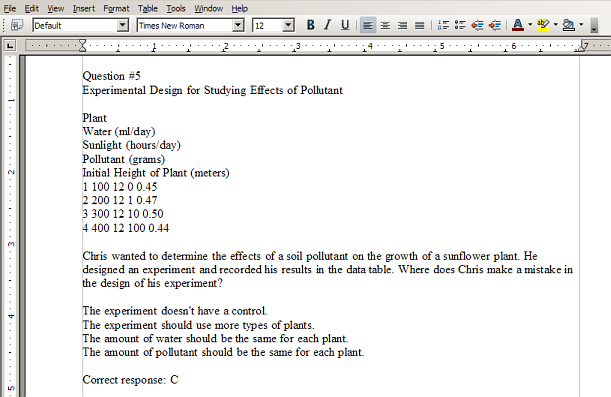
You will almost certainly need to clean up a problem after converting it into plain text. If you are going to import multiple problems, it is generally faster to do the cleanup all at once in your word processor, using tools like search-and-replace. You should remove problem numbers and labels in front of multiple-choice answers (see picture above). Also, if your word processor applies any styling to the imported text, such as “preformatted”, remove it or change it to “default”. The following picture shows our sample problem after cleanup.
-
Highlight the text of the problem and press Ctrl-C (or Cmd-C on a Macintosh) or choose Edit menu > Copy.
-
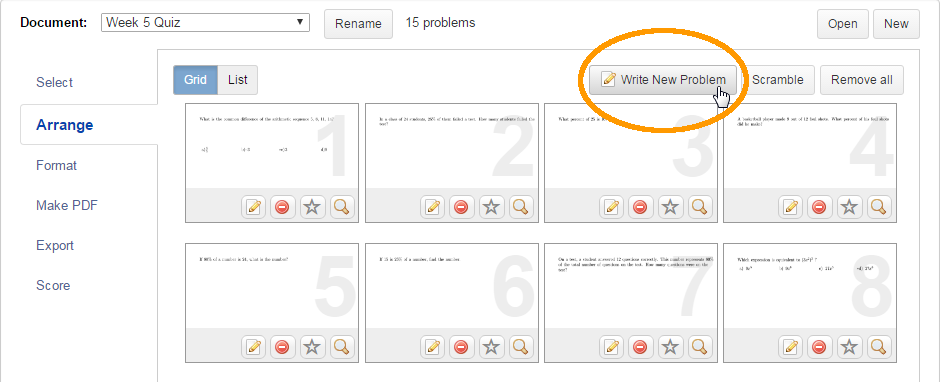
Switch to Problem-Attic. If you have not already done so, open or start a new document, go to Create. Go to the Arrange tab, and click the Write New Problem button.
-
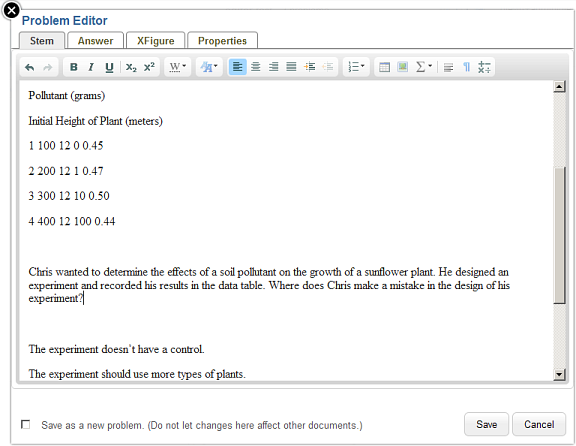
In the editor, click inside the Stem tab and press Ctrl-V (or Cmd-V). The text of the problem should now appear in the editor, as shown below.
-
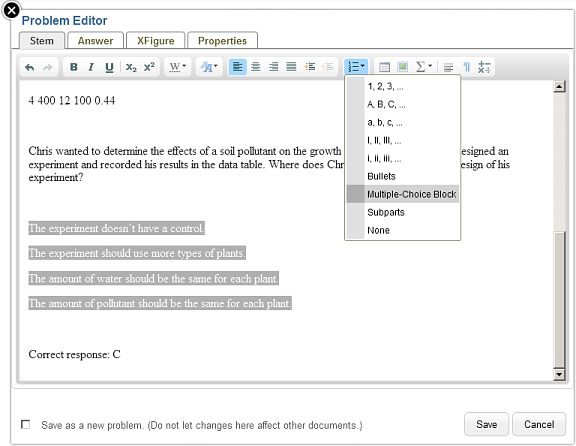
If you’ve pasted in a multiple-choice problem, you can quickly format the choices. Highlight them, then click Lists in the editor toolbar. Select Multiple-Choice Block.
-
To mark the answer, right-click on a choice. Then choose Mark Correct Answer on the pop-up menu.
Note: before you can right-click on a choice, it may be necessary to de-select the highlighted block.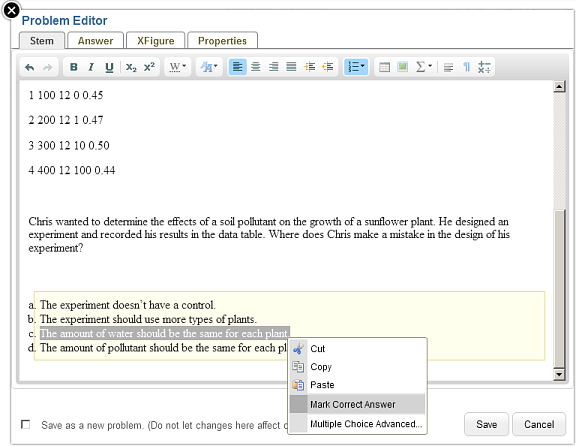
-
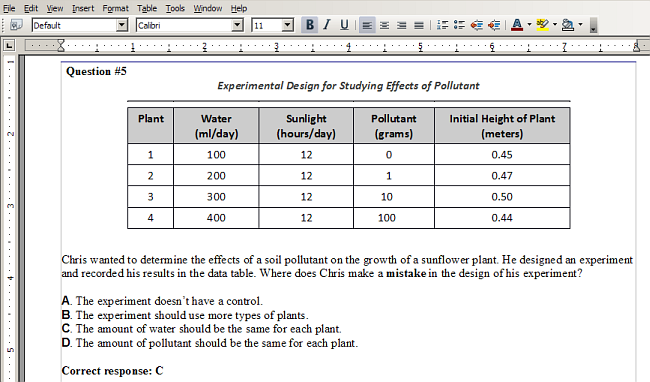
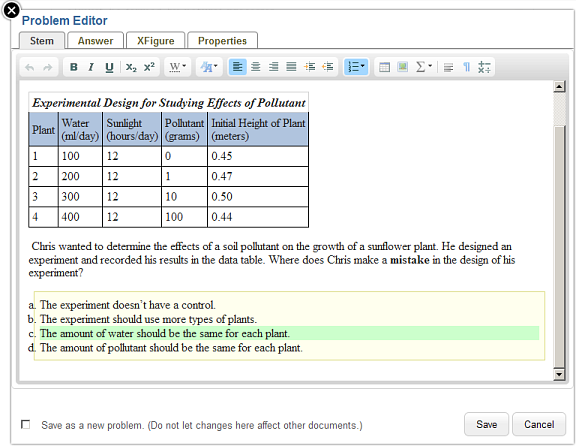
At this point you can add other elements to the problem, such as a table or math formula, upload an image, or apply font affects. This is all done through the options in the editor toolbar. The picture below shows how the sample problem has been re-created in the editor, including the table with a shaded header row and title. Problem-Attic’s built-in help explains more about the editor options.
-
Click Save when you’re done making changes. You will see a nicely formatted problem image (called a “thumbnail”) as shown below.

 TIP:
As an option to saving and re-opening a document in your word processor, you can also copy/paste to a plain text editor such as Windows Notepad. This may be a faster intermediate step toward importing into Problem-Attic.
TIP:
As an option to saving and re-opening a document in your word processor, you can also copy/paste to a plain text editor such as Windows Notepad. This may be a faster intermediate step toward importing into Problem-Attic.